Description
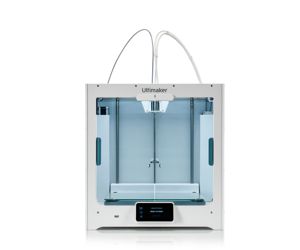
The Material Station is an add-on for the UltiMaker S5 and UltiMaker S7. With the Material Station, you can load and store up to 6 spools of filament at the front of the printer. Spools can be loaded and removed even while another spool is printing. The Material Station will automatically switch to another spool of the same material once filament runs out, increasing your productivity.
Preparation
First, make sure that the printer is ready for the Material Station installation. If you have already been using the UltiMaker S5 or S7 and now add the Material Station, you will not need the spool holder anymore. Unload the material(s) and remove the spool holder. Power off the printer and disconnect the power cable.
For the UltiMaker S5 that already had an Air Manager installed and for the UltiMaker S7, the Air Manager cable will be disconnected from the printer and reconnected to the Material Station. However, it is recommended to leave the cable in place until connecting the Material Station cable to prevent it from getting in the way.
Unbox the Material Station by removing the plastic locking clips at the bottom of the box. Holding the handles, lift the upper section of the box. Place the foam pieces, documents, and accessories aside.
Tip: It is recommended to remove the packaging with the box placed on the floor for safety. Please retain all packaging for warranty purposes.
Place the Material Station on a flat and stable surface. Make sure the location is suitable. The Pro Bundle must be positioned out of direct sunlight when in use. Ensure there will be at least 10 cm of space behind the Material Station for airflow.
Caution: When placing the Material Station on a shelf or table, take proper measures to prevent the printer from falling. Ensure the surface can take the combined weight of the Material Station and printer. Including materials, the total weight can be up to 50 kg (110 lbs) when used with the UltiMaker S5 and up to 57 kg (126 lbs) when used with the UltiMaker S7.
Installation
|
Caution: The UltiMaker S5 or S7 must be lifted by at least two people during installation. Ensure that the printer and the Material Station are correctly aligned and that the Material Station’s Bowden tubes do not get stuck underneath the printer. |
|
|
|
|
|
|
|
Connections
Tip: For the UltiMaker S5 that already had an Air Manager installed and for the UltiMaker S7, disconnect the Air Manager cable from the printer’s UMB OUT port. It will be reconnected to the Material Station.
|
|
|
|
Caution: A mains socket with protective earth/ground terminal must be used. Make sure that the building installation has dedicated means of over-current and short-circuit protection.
Tip: For the UltiMaker S5 with an Air Manager and for the UltiMaker S7, the Air Manager cable must be connected to the UMB OUT port of the Material Station.
The Material Station is now installed. The Material Station will automatically turn on as soon as power is supplied. The LEDs will turn on and you may hear a loud noise; this is normal. Turn on the UltiMaker S5 or S7 with the power switch at the back to boot up the complete system.
You can now proceed to load material spools. At least one spool must be loaded before you can start printing. Learn more about compatible spool dimensions here.